2. How to Increase the Max Input Vars Limit & WP memory Limit
3. Importing demo content
4. How to Refresh / Flush WordPress Permalinks
5. Installing WordPress
6. How to Use Mega menu?
7. Configuring the front page and the blog page
8. Configuring the menu
1. Installing the theme
After installing WordPress, the next step is to install the Mayosis theme. There are two ways to do this:
using FTP and using WordPress.
Using WordPress
1. Log in as admin;
2. Navigate to Appearance > Themes > Install themes;
3. Upload the .ZIP file named mayosis.zip.
If you want to install the child theme too repeat the steps above, but upload the child theme .ZIP file.
Using FTP
1. Extract the .ZIP. This will leave you with a folder named ‘mayosis’;
2. Using your FTP client of choice navigate to /wp-content/themes and upload the folder there.
If you want to install the child theme too repeat the steps above, but upload the child theme folder.
Activating
No matter which method you choose, the theme needs to be activated after install. To activate the
Mayosis theme navigate to Appearance à Themes and choose the blue ‘Activate’ button which
appears under the Mayosis> license.
2. How to Increase the Max Input Vars Limit & WP memory Limit
Increase Max Input Vars
The max_input_vars directive can be set in .htaccess, php.ini , .user.ini or wp-config.php file.
Directive for .htaccess
php_value max_input_vars 4000
Directive for php.ini or .user.ini
<strong>max_input_vars =4000
</strong>
Directive for wp-config.php
@ini_set( 'max_input_vars' , 4000 );<span></span>
Increase WP Memory Limit
Directive for wp-config.php
define( 'WP_MEMORY_LIMIT', '512M' );
If this code already exists in your wp-config.php file, you need to increase the number. For example, you can increase it from 32M to 512M.
If you don’t see this line of code in the file, you’ll need to add it. Just add the following code above the line that says
/* That's all, stop editing! Happy publishing. */:
3. Importing demo content
Please note that you can only import demo content after installing all the required plugins first. If you
have not done this yet, please do this now before continuing this step. If you would like to use Easy
Digital Downloads – Frontend Submissions for a multivendor marketplace please install and activate
this plugin first, too.
Importing demo content gives you a head start in which you mostly need to customize as you wish.
To import demo content, follow the next steps:
1. Log in as admin;
2. In the left panel go to Mayosis > Import demo content;
3. Choose the demo you would like to import. Because we like to give our user maximum freedom
in their preferences, we have made multiple demos with the page builders ‘Elementor’ and
‘WPBakery’. This means that you can import the demo with the page builder of your
preference;
4. After clicking ‘import’ please wait for a few minutes till all the demo content is imported.
You are all set; all the demo content is now imported and you should have the same website as the demo
4. How to Refresh / Flush WordPress Permalinks
Whenever a new custom post is added through a plugin or code, WordPress permalinks usually need to be flushed. Also, that's required after transferring the site to another domain.
Step 1: In the WordPress admin area, go to “Settings > Permalinks”
Step 2: Click “Save Changes”
Step 3: Permalinks and rewrite rules are flushed.
5. Installing WordPress
Since Mayosis is a WordPress theme, WordPress needs to be installed on your webserver. Many
hosting providers provide an easy to use installer called Installatron, which is available in your CPanel.
If your hosting provider does not offer this option, WordPress can still be easily installed. Please visit
http://WordPress.org and download the most recent version of WordPress. After downloading the
Installing_WordPress) to see how you can install WordPress on your webserver.
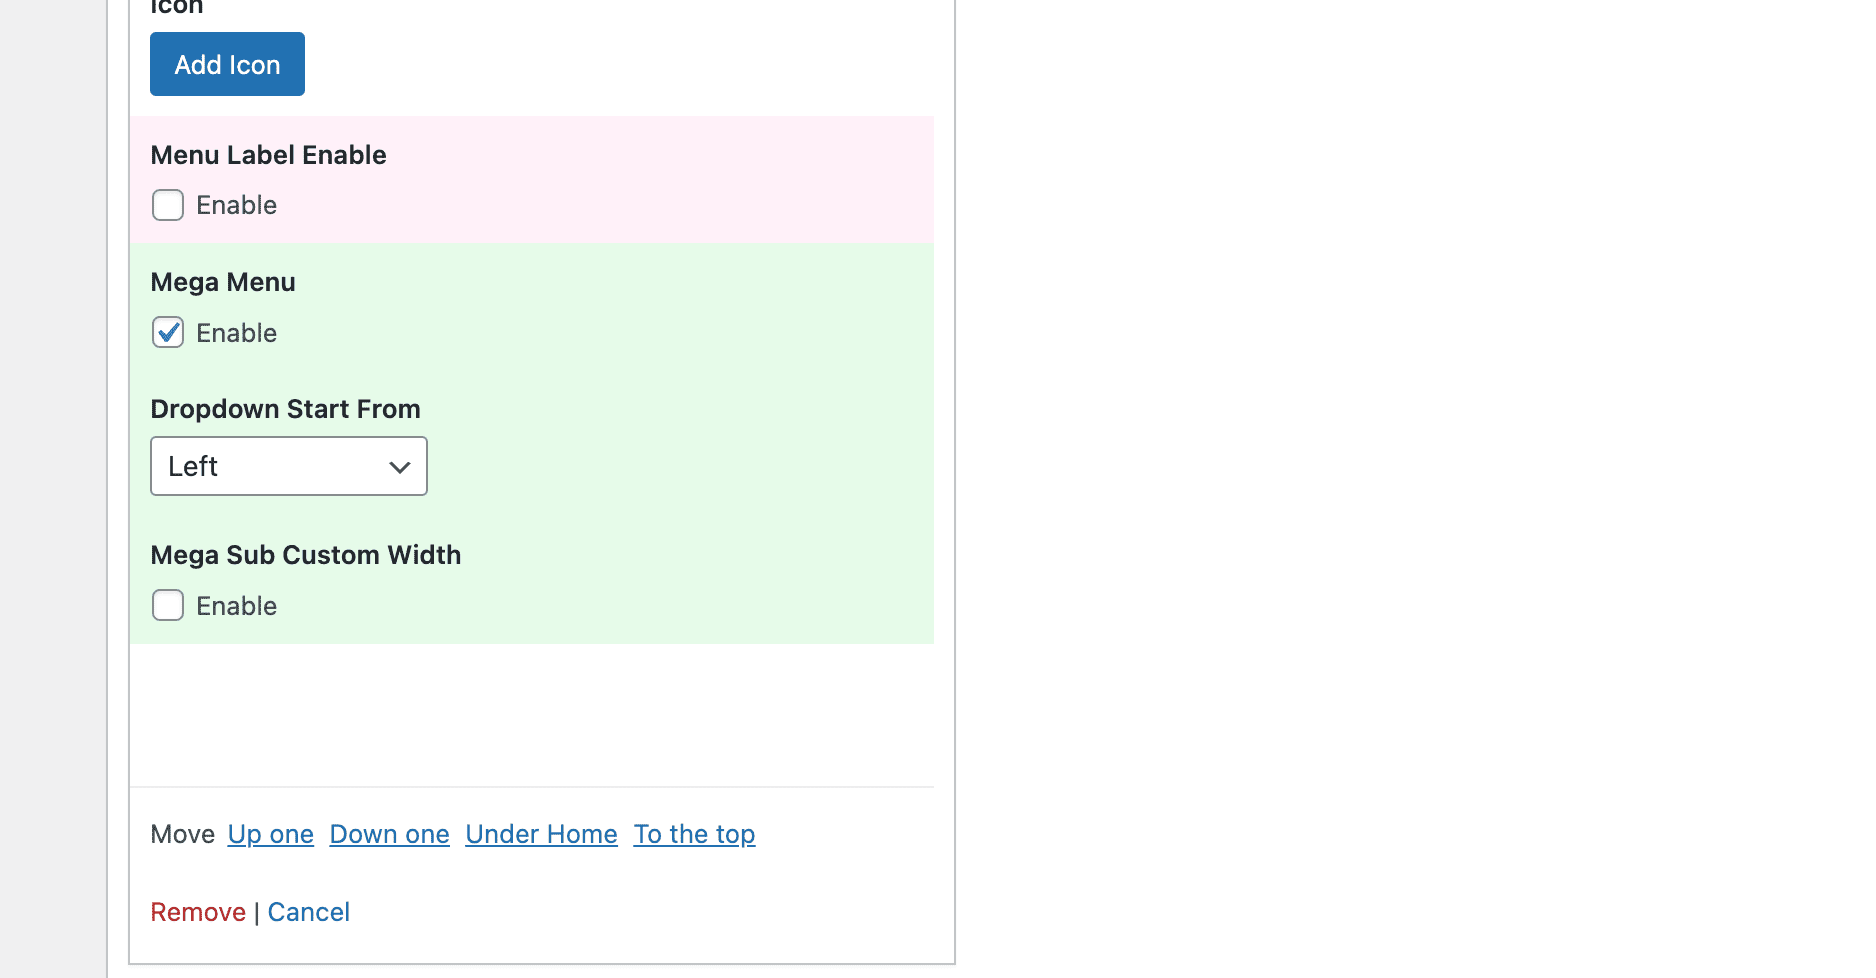
6. How to Use Mega menu?
1. At first, enable the Mega menu from the Customizer option panel. There you will find mega menu color options. Typography options are included in typography.
2. Now go to the menu from Appearance & After that open the menu item (in the first level) which you want to have a dropdown Megamenu, and check the box “Megamenu”
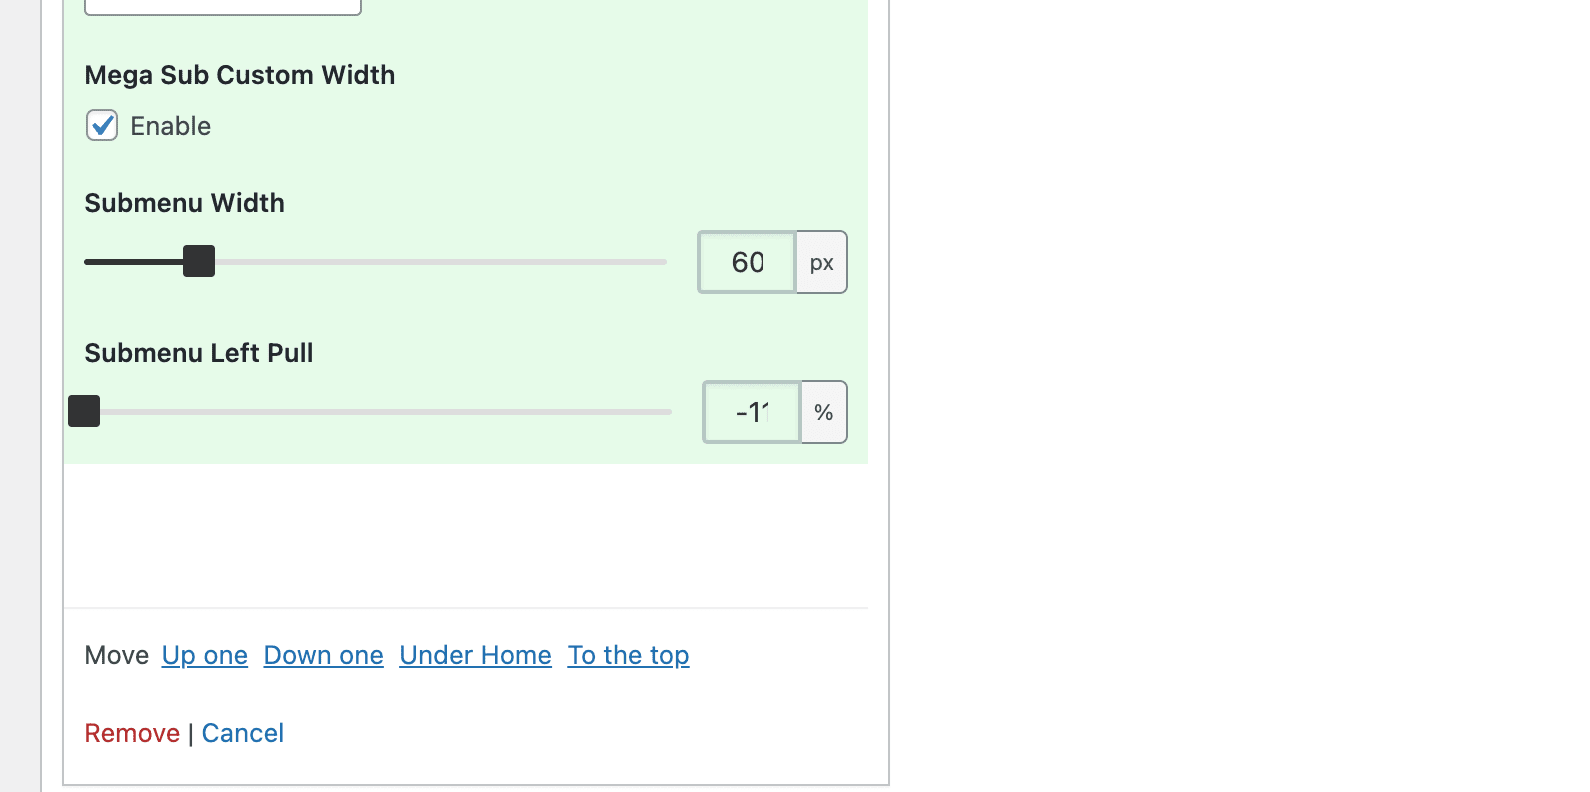
Megamenu size
You will be able to set the custom width of mega menu. Set width & pull left by the negative or positive value.
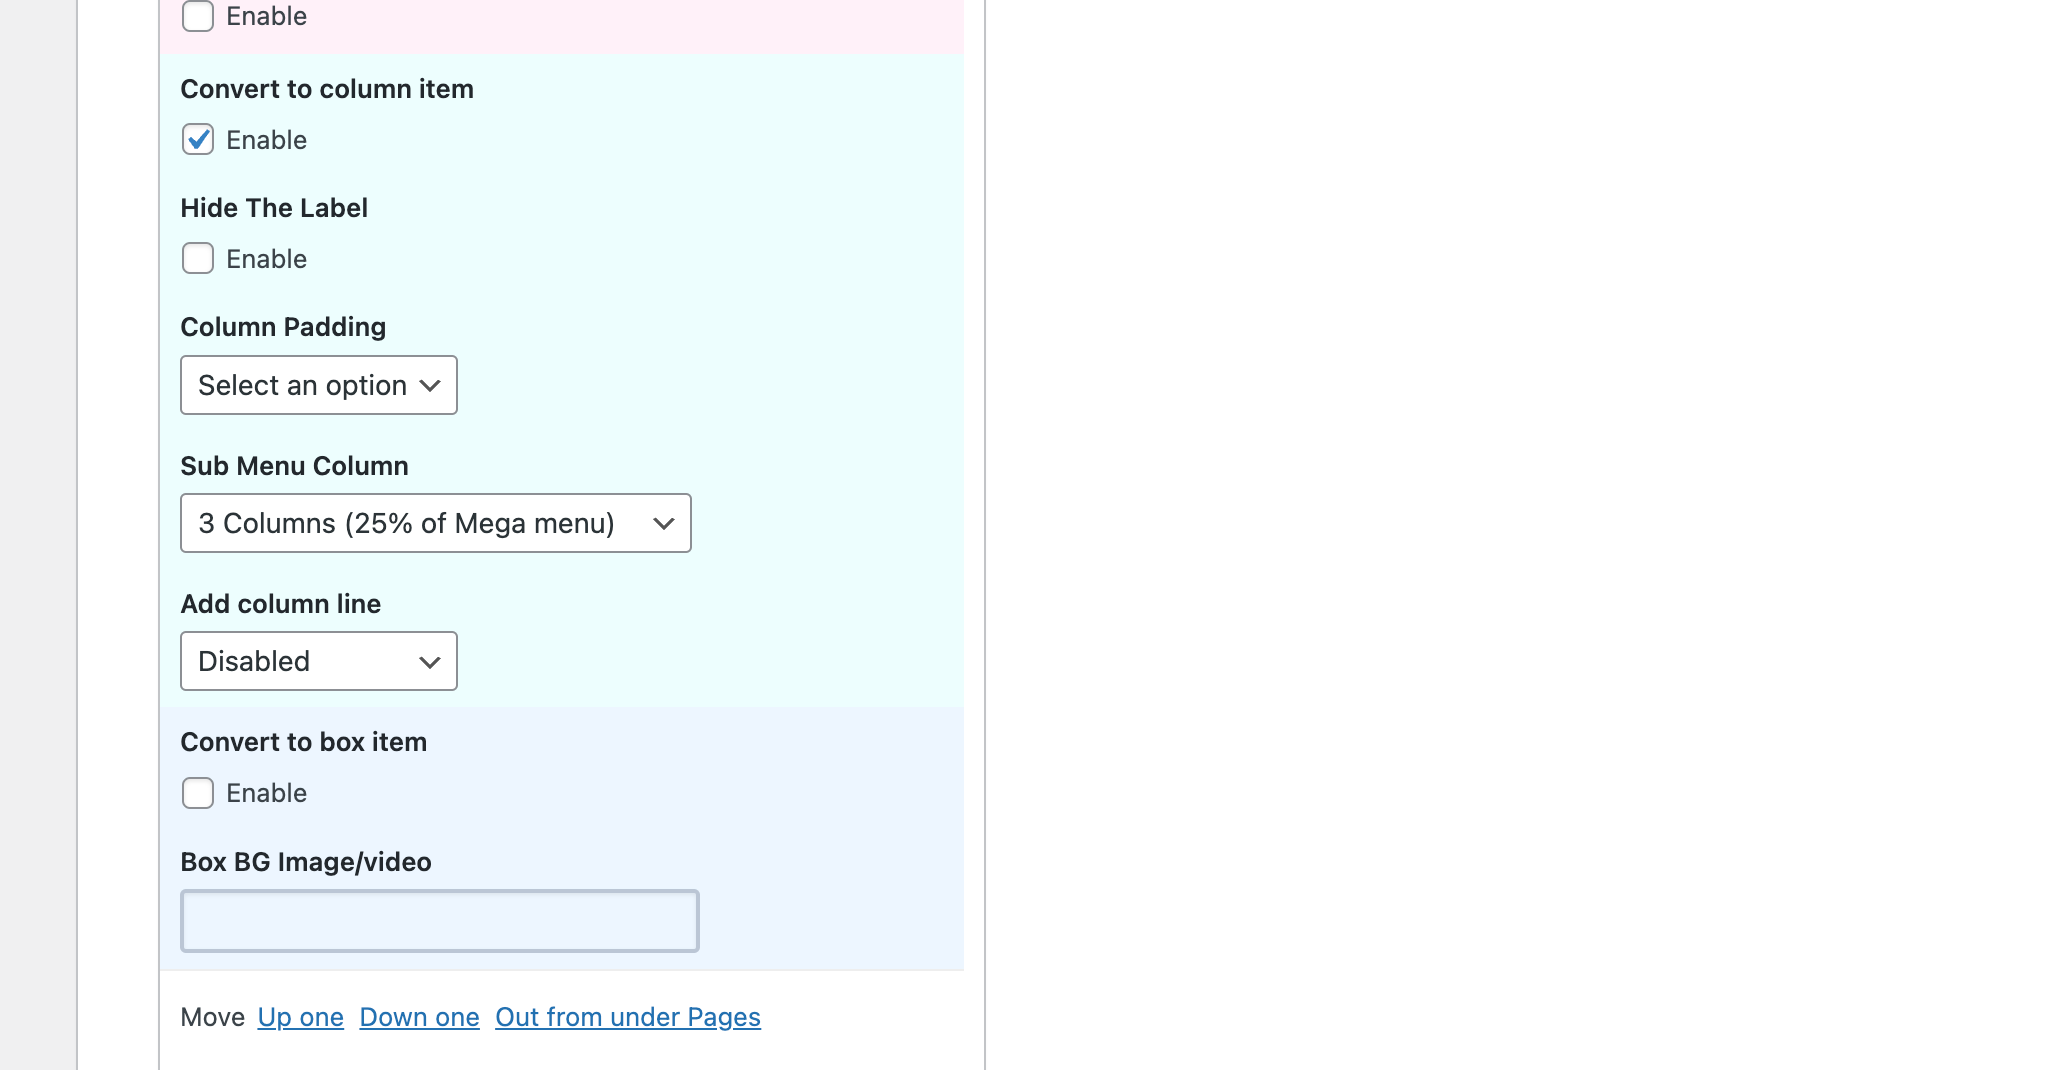
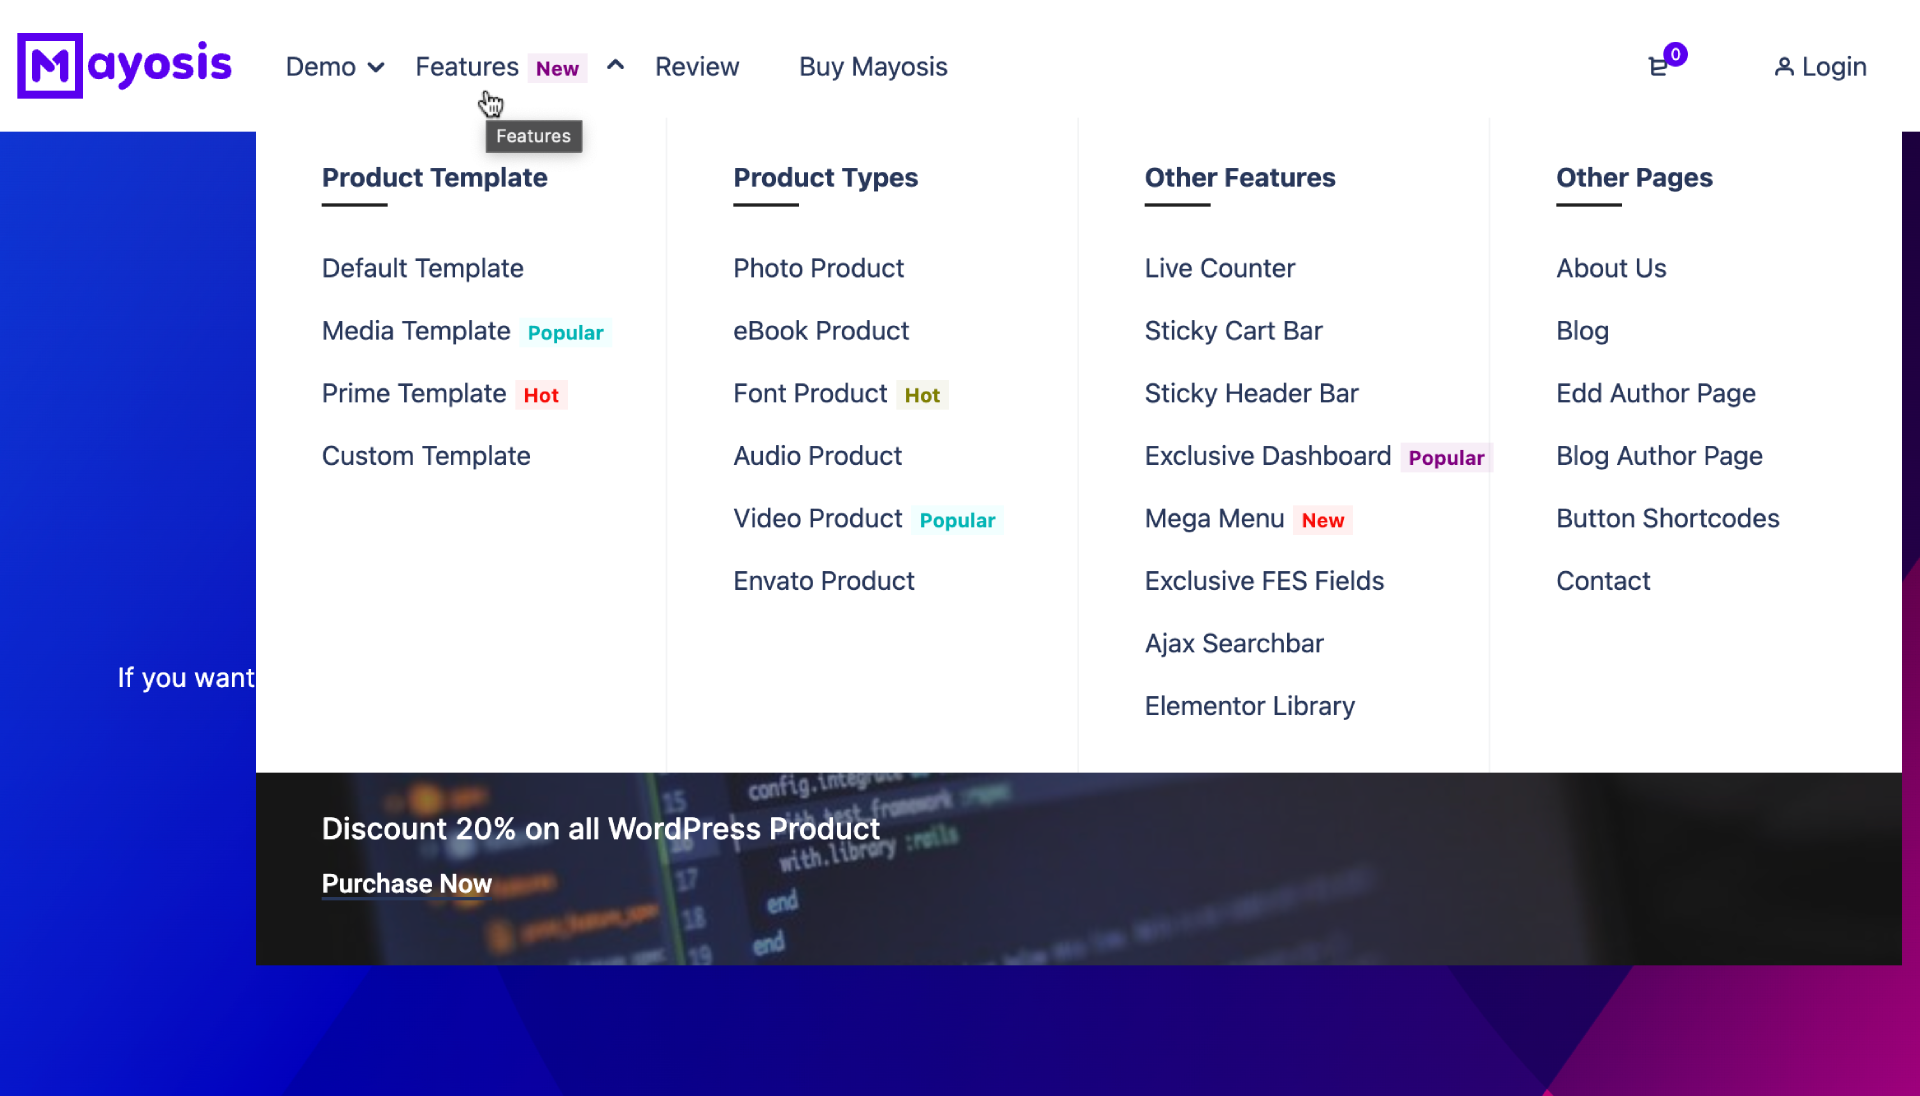
Adding columns to your Mega Menu:
To add columns to your mega menu, add a custom link from the left area with a link as “#” and the link as the desired title of the column inside the Megamenu (for example: About us), and add this custom link under the main mega menu main item (as second-level item), and check the box “Convert to column item”, you can also choose the desired column width of this column, or you can change the style of the column by adding padding or lines.
You can now add any number of columns the same way inside the mega menu, and the columns can be in any different sizes depending on the style that you want to build.
You can set a title for the whole column via the “Hide the Label field of that column item in your menu
Adding menu banners or Elementor Content
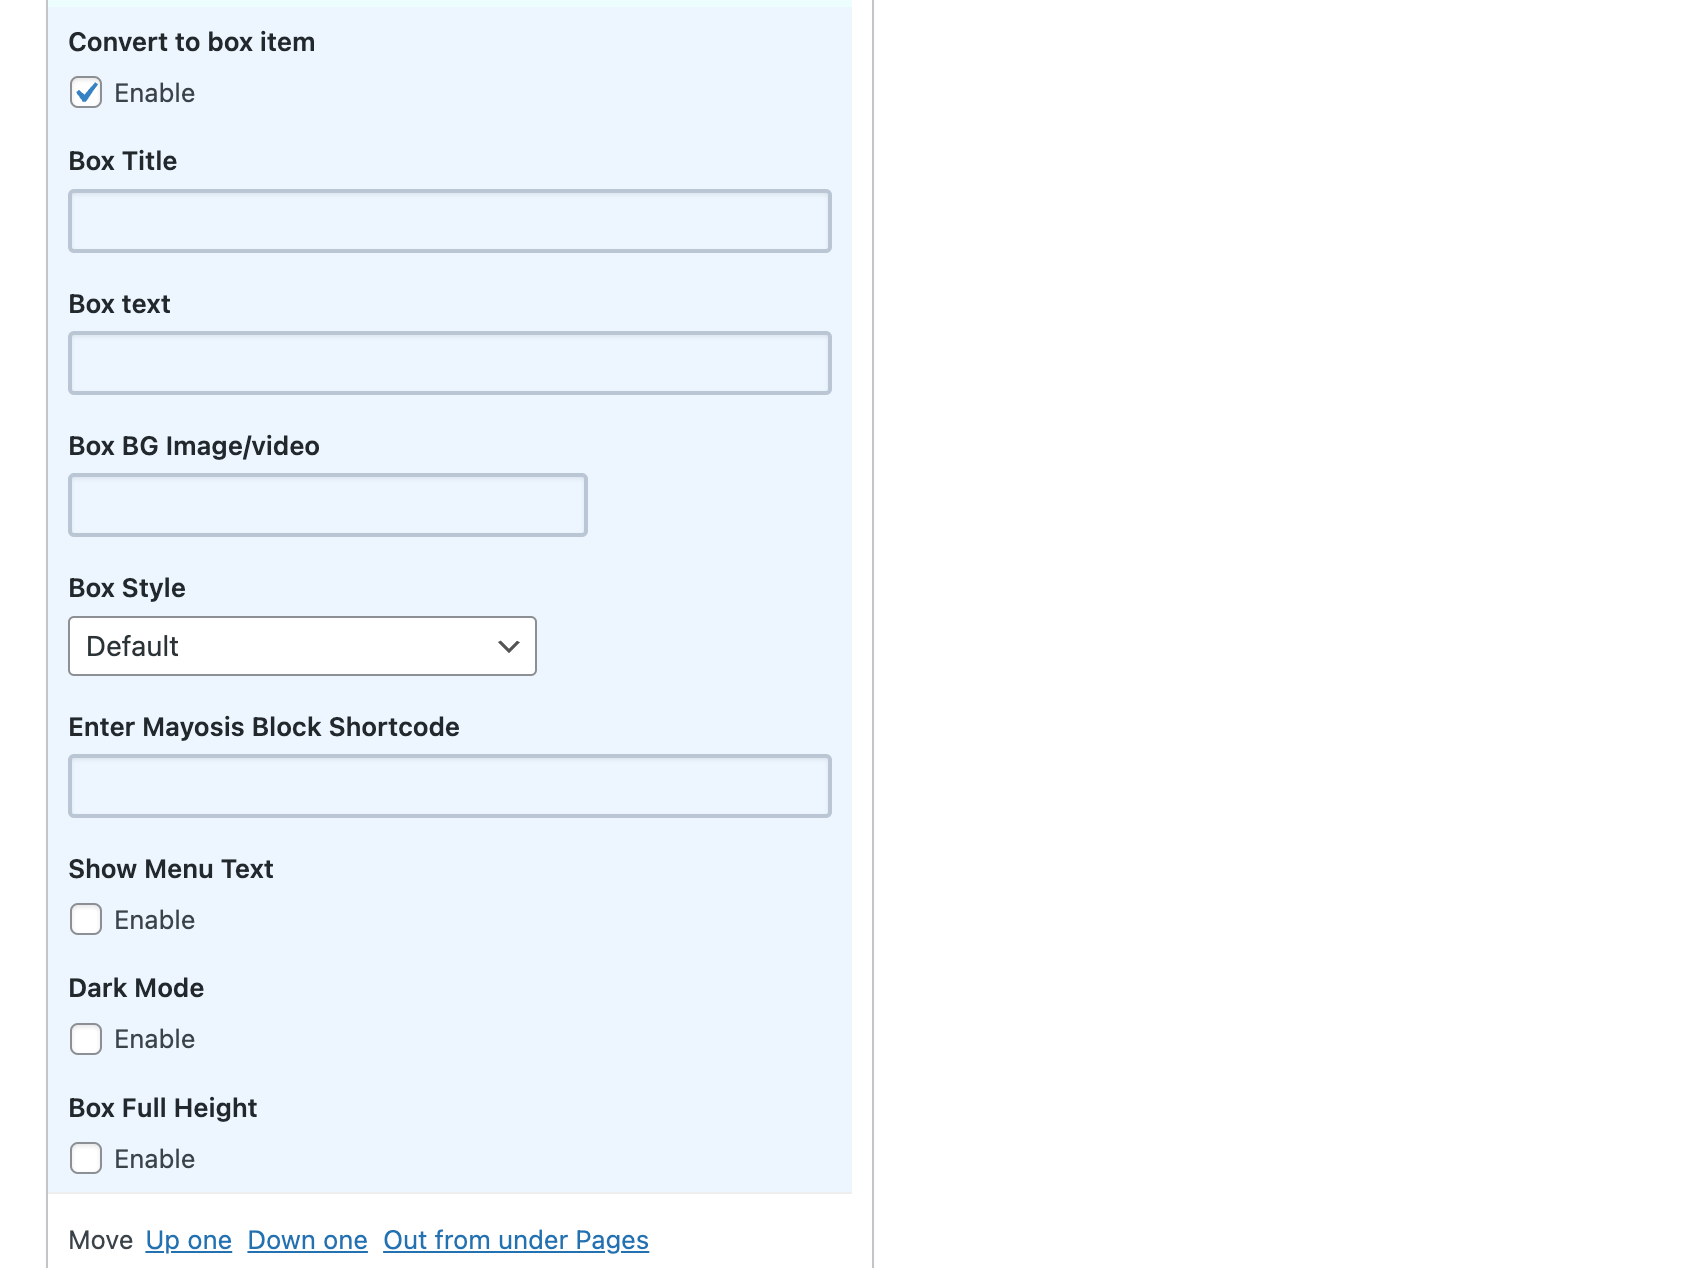
In addition to normal links, you can add advanced items to the mega menu like the image or video banners, to do so add any menu item inside the mega menu then open its options, then check the box “Convert to Box item” and choose the desired Title and text, and choose an image/video, you can also change box style or its height or the color of the text inside the box. Also, add Mayosis Block Shortcode To show Elementor custom content. That's much easy to show your Elementor column or anything by elementor by shortcode.
This is much easier to handle. If need more help please create a ticket.
7. Configuring the front page and the blog page
You may need to set your front page and/or blog page yourself, or you may want to change these
pages.
To do this, follow the next steps:
1. Log in as admin
2. In the left panel go to Settings > Reading
3. Choose the pages for both the front page and the blog page.
You have now set a front page and blog page.
8. Configuring the menu
If you want to create a menu or change the menu imported by the demo, you can do so. To do this,
follow the next steps:
1. Log in as admin
2. In the left panel go to Appearance > Menus
3. Here you can change the menus, and also change the menu locations.
More information about using WordPress Menus can be read in the Codex, here: